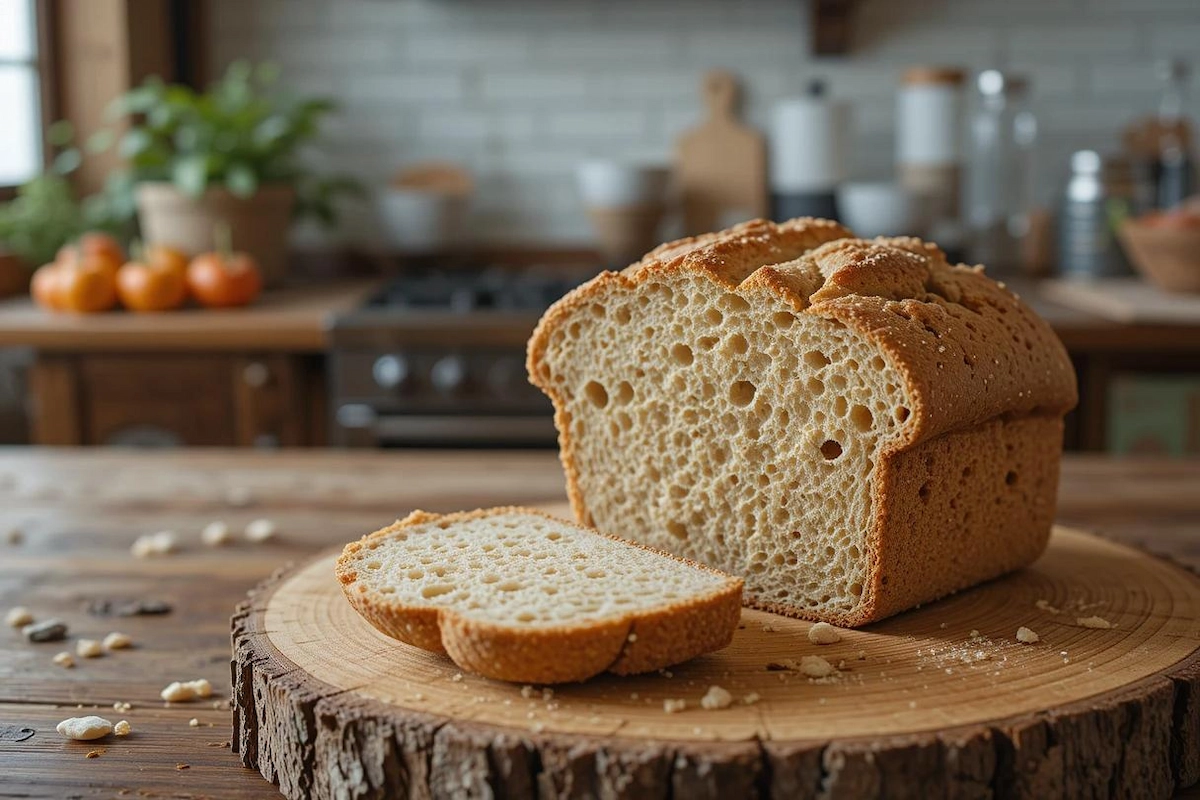
When my youngest was diagnosed with gluten sensitivity, our entire kitchen had to change. As a mom living in sunny California, juggling family, food, and flavor is part of my daily rhythm. But let me tell you—finding the best gluten-free bread felt like a mission. Not just any loaf would do. It had to be soft, wholesome, and something my kids would actually eat without scrunching their noses.
Whether you’re just starting out on a gluten-free journey or, like me, looking for better alternatives to serve your family, knowing which breads are truly worth your pantry space makes all the difference. The right loaf can transform your mornings, elevate your sandwiches, and turn simple meals into something your family will actually get excited about.
So I dove into taste-testing, reading labels, and chatting with fellow food-loving mamas. And today, I’m sharing what I’ve learned—because exploring your options is more than just practical. It’s part of building a delicious, feel-good lifestyle that works for your whole family.
By the end of this guide, you’ll have my go-to list of the best gluten-free bread, trusted brands I actually buy, and tips for how to make them work in real-life, everyday meals. Let’s make gluten-free eating tasty and joyful—one slice at a time.
Table of Contents
What Is Gluten-Free Bread?
GImagine bread without wheat, barley, or rye—that’s gluten-free bread. It’s made for those with celiac disease or gluten sensitivities, but honestly? Anyone looking for a healthier lifestyle might fall in love with it too.
Instead of traditional flour, gluten-free breads are built from a mix of amazing ingredients like:
- Rice Flour – Light and gentle, it’s often the base.
- Sorghum Flour – Slightly sweet and rich in nutrients.
- Tapioca Starch – Adds that soft, chewy bite.
- Almond Flour – Nutty and moist (a personal favorite of mine).
- Potato Starch – Helps retain that lovely crumb.
Since there’s no gluten to hold it all together, you’ll often see binders like:
- Xanthan Gum
- Guar Gum
- Psyllium Husk – This one really helps make it less crumbly and more like the bread we all grew up with.
Many breads also throw in flax, chia, or sunflower seeds, which add both crunch and nutrition. And if you’re like me and love a good homemade taste, keep an eye out for versions with yogurt or plant-based milk to boost softness.
Why I Choose the Best Gluten-Free Bread (and You Should Too)
After making the switch for my family, I saw how gluten-free bread helped with digestion, reduced bloating, and kept us feeling full and light. It wasn’t just about avoiding gluten—it was about feeling better every single day.
And let’s be real, gluten-free eating used to feel like a sacrifice. But now? With the right brands, it’s a delight. I’ve found breads that toast like a dream, hold up to juicy sandwich fillings, and even turn into the best French toast you’ve ever tasted.
What to Look for When Buying Gluten-Free Bread
If you’re like me and often choose the convenience of store-bought bread over baking from scratch (because let’s face it—life is busy!), here are a few key things I always consider to make sure I’m getting the best loaf possible:
- Ingredients: I stick to options made with whole, recognizable ingredients. Try to avoid breads packed with fillers or overly processed starches.
- Nutritional Value: I always check the label for fiber, protein, and essential vitamins. Some gluten-free breads can be a little light on nutrients, so fortified or whole grain options are a win.
- Texture & Taste: Not all gluten-free bread is created equal. Some are dry, others too gummy—so don’t be afraid to try a few brands until you find your favorite.
- Allergen Information: If you’re buying for kiddos or anyone with food sensitivities, double-check that it’s made in a certified gluten-free facility and doesn’t contain other allergens like dairy or soy.
- Shelf Life: Gluten-free bread tends to go stale faster, so I often keep mine in the freezer and just toast slices as needed. Look for vacuum-sealed or frozen options if you’re not going to eat it quickly.
- Price vs. Quality: Yes, some loaves are pricier—but in my experience, the extra couple of dollars can make a big difference in flavor, texture, and nutrition.
Key Considerations When Choosing Gluten-Free Bread:
- Ingredients: Look for breads made with high-quality, gluten-free grains such as rice flour, sorghum, or quinoa. Some gluten-free loaves may contain additives or preservatives, so it’s always beneficial to choose ones with fewer processed ingredients. Additionally, check if the bread contains any hidden allergens like dairy or eggs, depending on your dietary restrictions.
- Texture and Freshness: Gluten-free bread often has a different texture than regular bread. Some might be denser or more crumbly, while others can be soft and fluffy. The freshness of the bread is also important, as gluten-free bread tends to have a shorter shelf life compared to regular bread. If possible, buy bread from a bakery that specializes in gluten-free options or consider freezing loaves for longer storage.
- Flavor: Gluten-free bread can vary widely in flavor, with some loaves being subtly sweet or nutty, while others have a more neutral taste. Experiment with different types to find the flavor that suits your palate best.
- Nutrition: Gluten-free bread can sometimes lack fiber or other essential nutrients found in traditional whole grain bread. Consider looking for options that are fortified with fiber, protein, and other nutrients to ensure a balanced diet.
- Brand Reputation: Some gluten-free bread brands are more reputable for their consistency and quality than others. Reading reviews and seeking recommendations from others on a gluten-free diet can help guide your decision.
With the right choice of the best gluten-free bread, you can enjoy a wide variety of delicious meals throughout the day, from breakfast to dinner. By considering the ingredients, texture, flavor, and nutritional content of the bread you choose, you can ensure that each meal is both satisfying and gluten-free.
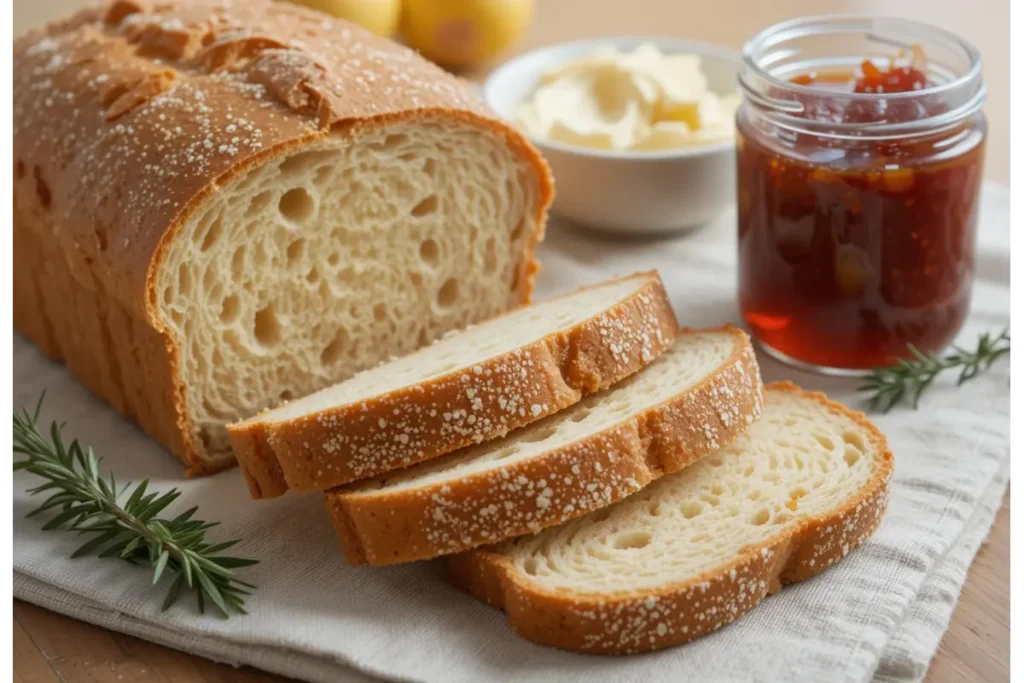
Everyday Gluten-Free Sandwich Bread
If you ever decide to make your own gluten-free bread, this gluten-free sandwich bread is a staple in my kitchen. It’s soft, rises beautifully, and works wonders for toast, sandwiches, or snacking with a swipe of almond butter.
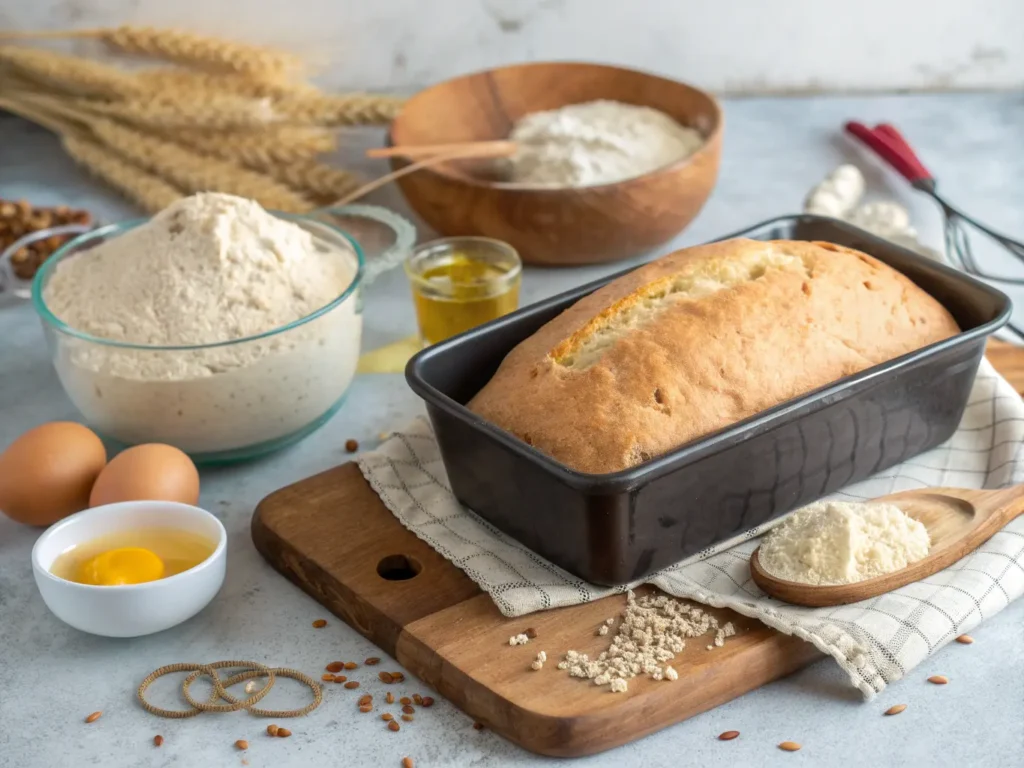
Ingredients:
- 2 ½ cups gluten-free all-purpose flour blend (with xanthan gum included)
- 1 tablespoon active dry yeast
- 1 tablespoon sugar
- 1 ½ cups warm water (about 110°F)
- 3 tablespoons olive oil
- 2 large eggs (room temp)
- 1 teaspoon apple cider vinegar
- 1 teaspoon salt
Time:
- Prep Time: 15 minutes
- Rise Time: 45 minutes
- Bake Time: 35 minutes
- Total Time: 1 hour 35 minutes
Instructions:
Step 1: Activate the Yeast
In a small bowl, combine the warm water, sugar, and yeast. Stir gently and let it sit for about 5-10 minutes until frothy.
Step 2: Mix the Wet Ingredients
In a separate large bowl, whisk together the eggs, olive oil, and apple cider vinegar.
Step 3: Add the Dry Ingredients
Add the flour and salt to the wet mixture, then pour in the activated yeast. Use a stand mixer or hand mixer to beat the batter for about 5 minutes. The dough will be thick but sticky—more like a batter than traditional bread dough.
Step 4: Let It Rise
Spoon the dough into a greased 9×5-inch loaf pan. Smooth the top with a spatula dipped in water. Cover with a clean kitchen towel and let it rise in a warm place for 45-60 minutes until it reaches just over the rim.
Step 5: Bake
Preheat your oven to 375°F (190°C). Bake for 35–40 minutes, or until golden brown and the top sounds hollow when tapped. If it browns too quickly, loosely tent with foil in the last 10 minutes.
Step 6: Cool and Slice
Let the bread cool in the pan for 5 minutes, then transfer it to a wire rack. Cool completely before slicing (this helps the texture set!).
How I Use Gluten-Free Bread in My Kitchen
Gluten-free bread is a kitchen chameleon. Here’s how I use it:
Breakfast
- Avocado toast with chili flakes and a poached egg (so good!)
- Cinnamon French toast for slow Sunday mornings
Lunch
- Turkey sandwiches for the kids
- Hummus-topped open-face toasts for me
Dinner
- Croutons in my Caesar salad
- Gluten-free breadcrumbs for crispy baked chicken
Honestly, the possibilities are endless when you’ve found a good loaf.
FAQs About the Best Gluten-Free Bread
Q: Is gluten-free bread healthier than regular bread?
A: While not inherently healthier, these loaves are essential for those avoiding gluten. Look for options with added fiber and protein for a balanced diet.
Q: Why is it more expensive?
A: The higher price is due to specialized ingredients and production methods. Additionally, brands often adhere to rigorous certification standards, which contribute to the cost.
Q: What flours are commonly used in gluten-free bread?
A: Popular choices include rice flour, almond flour, tapioca starch, and sorghum flour.
Q: Can I bake my own gluten-free bread?
A: Absolutely! With high-quality gluten-free flours and stabilizers, you can make fresh, artisanal loaves at home.
Q: How should I store gluten-free bread?
A: Due to its shorter shelf life, freezing is the best storage method. Thaw slices as needed.
Final Thoughts from My Kitchen to Yours
Switching to gluten-free bread wasn’t just a dietary change—it became a journey of discovery for me and my family. From the first loaf that fell apart in the toaster (oh yes, it happened) to finding brands we love and recipes we now crave, it’s been delicious every step of the way.
So whether you’re gluten-sensitive, cooking for someone who is, or just curious, I hope this guide helps you feel excited and empowered to explore the world of gluten-free bread. From my California kitchen to yours—happy slicing!
PrintBest Gluten-Free Bread: A Simple Guide
Here’s a step-by-step recipe for a simple, delicious Gluten-Free Sandwich Bread that’s soft, slightly nutty, and perfect for everyday meals.
- Prep Time: 15 minutes
- Rise Time: 45 minutes
- Cook Time: 35 minutes
- Total Time: 1 hour 35 minutes
- Yield: 1 loaf 1x
- Category: Baking
- Cuisine: Gluten-Free
- Diet: Gluten Free
Ingredients
-
- 2 ½ cups gluten-free all-purpose flour blend (with xanthan gum included)
-
- 1 tablespoon active dry yeast
-
- 1 tablespoon sugar
-
- 1 ½ cups warm water (about 110°F)
-
- 3 tablespoons olive oil
-
- 2 large eggs (room temp)
-
- 1 teaspoon apple cider vinegar
-
- 1 teaspoon salt
Instructions
Step 1: Activate the Yeast
In a small bowl, combine the warm water, sugar, and yeast. Stir gently and let it sit for about 5-10 minutes until frothy.
Step 2: Mix the Wet Ingredients
In a separate large bowl, whisk together the eggs, olive oil, and apple cider vinegar.
Step 3: Add the Dry Ingredients
Add the flour and salt to the wet mixture, then pour in the activated yeast. Use a stand mixer or hand mixer to beat the batter for about 5 minutes. The dough will be thick but sticky—more like a batter than traditional bread dough.
Step 4: Let It Rise
Spoon the dough into a greased 9×5-inch loaf pan. Smooth the top with a spatula dipped in water. Cover with a clean kitchen towel and let it rise in a warm place for 45-60 minutes until it reaches just over the rim.
Step 5: Bake
Preheat your oven to 375°F (190°C). Bake for 35–40 minutes, or until golden brown and the top sounds hollow when tapped. If it browns too quickly, loosely tent with foil in the last 10 minutes.
Step 6: Cool and Slice
Let the bread cool in the pan for 5 minutes, then transfer it to a wire rack. Cool completely before slicing (this helps the texture set!).
Nutrition
- Serving Size: 1 slice
- Calories: 145
- Sugar: 2g
- Sodium: 230mg
- Fat: 4g
- Saturated Fat: 0.5g
- Carbohydrates: 24g
- Fiber: 2g
- Protein: 3g
Keywords: gluten-free bread