When it comes to desserts that balance rich creaminess with a sweet and tangy fruit topping, it’s hard to beat a cherry cheesecake recipe. This dessert isn’t just delicious; it’s also versatile. Whether you’re baking one for a cozy family gathering or preparing a quick no-bake version for a last-minute treat, a cherry cheesecake always manages to steal the show. Moreover, it’s a dessert that appeals to just about everyone, making it a go-to choice for any occasion.
If you’re looking to expand your dessert repertoire, you might want to explore the perfecting brookie recipe guide. A brookie pairs beautifully with cheesecake on a dessert table, creating a spread that offers both creamy and chocolatey delights. With that in mind, let’s dive right into the steps for creating this crowd-pleasing cherry cheesecake!
Table of Contents
Why Choose a Cherry Cheesecake?
Versatility: One of the best things about a cherry cheesecake recipe is its adaptability. Whether you prefer a baked version for its dense and creamy texture, a no-bake option for convenience, or even gluten-free and keto-friendly alternatives, this dessert caters to all dietary preferences. There’s truly something for everyone.
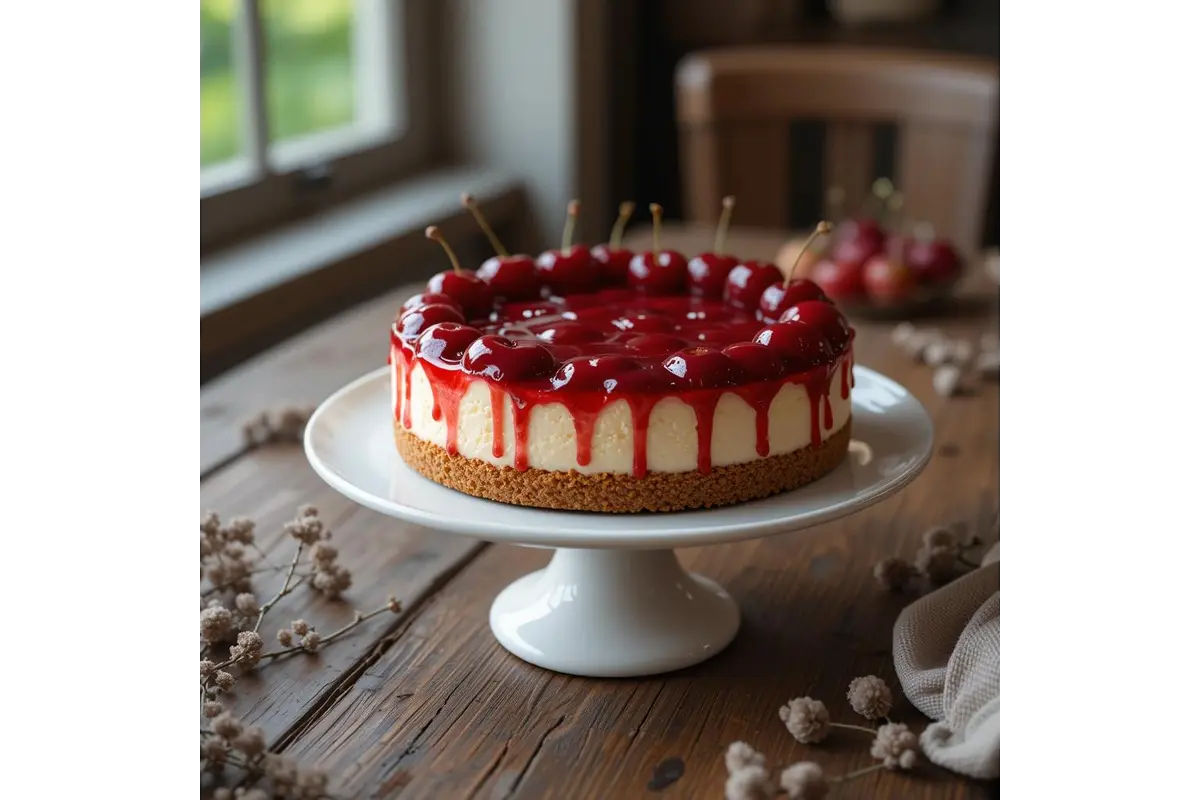
Visual Appeal: Beyond its incredible taste, the vibrant cherry topping makes a cherry cheesecake as beautiful as it is delicious. Its bright red hue adds a touch of elegance to any table, making it a centerpiece-worthy dessert that’s perfect for special occasions or everyday indulgence.
Flavor Harmony: The magic of a cherry cheesecake lies in its flavor balance. The creamy, slightly tangy base pairs wonderfully with the sweet and tart cherry topping, creating a combination that’s satisfying and memorable with every bite.
If you’re seeking even more dessert inspiration, why not pair your cheesecake with some gluten-free vegan treats? This combination ensures that everyone at the table, regardless of dietary needs, has a delicious option to enjoy.
Ingredients: A Winning Combination
The key to a successful cherry cheesecake recipe lies in fresh, high-quality ingredients:
- Crust: Graham crackers, butter, and a hint of sugar.
- Filling: Cream cheese, sugar, eggs (for baked), heavy cream, and vanilla extract.
- Topping: Fresh cherries or canned cherry pie filling.
Substitution Tips for the Cherry Cheesecake Recipe
If you have dietary restrictions or want to experiment with new flavors, here are some ideas:
- Gluten-Free Crust: Replace graham crackers with almond flour or gluten-free cookies. This option is perfect for those avoiding gluten and adds a subtle nuttiness to the crust.
- Keto-Friendly Sweetener: Use erythritol or monk fruit sweetener in place of sugar. These sugar substitutes keep the cheesecake low in carbs without compromising sweetness.
- Dairy-Free Filling: Substitute cream cheese with coconut cream or cashew cream for a dairy-free cheesecake.
- Alternative Toppings: Swap cherries for blueberries, strawberries, or even a mixed berry compote for a refreshing twist.
Pro Tip: Always taste-test your substitutions to ensure they complement the overall flavors of your cheesecake.
Step-by-Step: Crafting Cherry Cheesecake Recipe
This simple no-bake cherry cheesecake recipe is perfect for anyone who wants a quick and easy dessert without turning on the oven. The creamy filling and vibrant cherry topping make it a show-stopper.

Ingredients
The Crust:
- 2 cups of crushed graham crackers
- 1/2 cup (1 stick) of unsalted butter, melted
Filling:
- 16 ounces (2 packages) of cream cheese, softened
- 1 cup of powdered sugar
- 1 teaspoon of vanilla extract
- 1 1/2 cups of heavy whipping cream, whipped to stiff peaks
The Topping:
- 1 1/2 cups of cherry pie filling or fresh cherry topping (see below for a homemade topping recipe)
Instructions
Crust
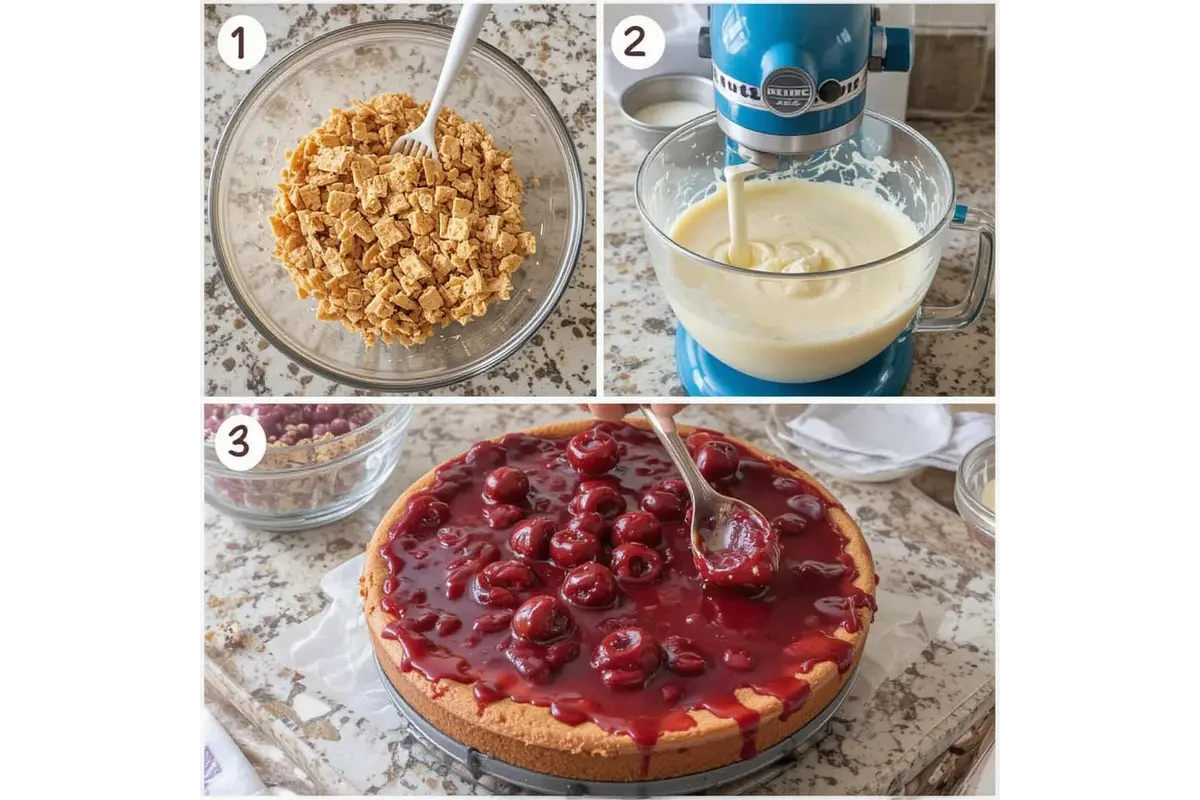
- Combine the crushed graham crackers with melted butter in a mixing bowl. Mix until the crumbs are evenly coated and resemble wet sand.
- Press the mixture into the bottom of a 9-inch springform pan, making sure it is compact and even.
- Chill the crust in the refrigerator for at least 20 minutes while you prepare the filling.
Filling
- In a large bowl, whisk the softened cream cheese, powdered sugar, and vanilla extract until smooth and creamy.
- Gently fold in the whipped cream, ensuring you don’t deflate it. This creates a light and airy texture.
Assembly
- Spread the filling evenly over the chilled crust, smoothing the top with a spatula.
- Refrigerate the cheesecake for at least 4 hours, or overnight for best results.
- Before serving, top with the cherry pie filling, spreading it evenly across the surface.
For more tips on mastering cheesecake baking techniques, explore the ultimate eggnog cheesecake guide for additional helpful insights.
Homemade Cherry Topping (Optional)
If you prefer a fresher taste, make your own cherry topping:
- 2 cups of pitted fresh cherries
- 1/4 cup of granulated sugar
- 1 tablespoon of lemon juice
- 1 tablespoon of cornstarch mixed with 2 tablespoons of water
Instructions
- In a saucepan, combine the cherries, sugar, and lemon juice over medium heat.
- Cook until the cherries release their juices and soften.
- Stir in the cornstarch mixture and cook until the sauce thickens, about 2-3 minutes.
- Let the topping cool before spreading it over your cheesecake.
Whether no-bake or baked, this cherry cheesecake recipe is guaranteed to impress! For seasonal inspiration, you can also adapt this with persimmon jam toppings.
Perfecting Your Cherry Cheesecake Recipe
Pro Tips for Success
Creating the perfect cherry cheesecake recipe can feel like an art, but with a few tried-and-true tips, you can achieve bakery-quality results at home. These pro tips will ensure a smooth, creamy, and crack-free cheesecake every time.
1. Use Room Temperature Ingredients
One of the most important tips is to bring your ingredients to room temperature before mixing. This applies to cream cheese, eggs, and even heavy cream. When these ingredients are at the same temperature, they blend together seamlessly, creating a smoother filling.
- Why it Matters: Cold cream cheese can form lumps that are difficult to dissolve, while cold eggs can cause uneven baking.
- Pro Tip: Leave your ingredients on the counter for 30–60 minutes before starting. If you’re in a hurry, you can place cream cheese in its wrapper in a bowl of warm water for a few minutes to soften it.
2. Avoid Over-Mixing
Over-mixing the cheesecake filling is a common mistake that can lead to cracks and a dense texture. While it’s tempting to mix thoroughly for a smooth batter, incorporating too much air into the mixture is problematic.
- Why it Matters: Too much air can cause the cheesecake to puff up during baking and then collapse as it cools, creating cracks.
- Pro Tip: Mix the filling on low speed, just until the ingredients are combined. Scrape down the sides of the bowl to ensure even mixing without overworking the batter.
3. Bake Slowly and Use a Water Bath
A water bath (also called a bain-marie) is a game-changer for baked cheesecakes. It involves placing your springform pan in a larger pan filled with hot water. This technique helps regulate the temperature during baking.
- Why it Matters: Even heat distribution prevents over-baking, reduces the risk of cracks, and ensures a creamy texture.
- How to Do It:
- Wrap the bottom and sides of your springform pan tightly in aluminum foil to prevent water from seeping in.
- Place the pan in a larger roasting pan and fill the roasting pan with enough hot water to reach halfway up the sides of the springform pan.
- Bake as directed, then let the cheesecake cool gradually in the oven with the door slightly ajar for an hour to prevent sudden temperature changes.
Additional Pro Tips for the Cherry Cheesecake Recipe
- Chill Thoroughly Before Serving: Cheesecake needs time to set. Refrigerate it for at least 4–6 hours, but overnight is even better.
- Use a Sharp Knife for Slicing: For clean slices, dip your knife in warm water and wipe it clean between cuts.
- Line Your Pan for Easy Removal: If you want to serve the cheesecake on a decorative platter, line the bottom of the pan with parchment paper before adding the crust.
By following these tips, you’ll create a cherry cheesecake recipe that not only looks professional but also tastes absolutely divine. These small adjustments make a huge difference in the outcome!
More Creative Variations
- Chocolate-Cherry Delight: Add a layer of chocolate ganache before the cherry topping.
- Layered Cheesecake: Alternate layers of cheesecake filling with cherry sauce for a visual treat.
- Nutty Crust: Use crushed pecans or almonds instead of graham crackers.
Looking for more ways to enhance your dessert table? Try these Christmas trifle recipes for holiday occasions.
Serving and Storing Your Cheesecake
Serving Tips for the Cherry Cheesecake Recipe
- Garnish with fresh cherries or whipped cream for an elegant presentation.
- Pair your cherry cheesecake with coffee or a sparkling beverage for a delightful contrast.
Storage Advice
- Refrigeration: Store leftovers in an airtight container for up to five days.
- Freezing: Wrap slices individually and freeze for up to two months.
Learn more about versatile desserts in the ultimate puff pastry guide, perfect for diversifying your dessert offerings.
FAQs: Answering Common Questions
Q: What is the difference between baked and no-bake cheesecakes?
A: Baked cheesecakes are denser, while no-bake versions are lighter and creamier.
Q: How do I prevent cracks in my baked cheesecake?
A: Use a water bath and avoid over-mixing.
Q: Can I prepare a cherry cheesecake ahead of time?
A: Yes! Cheesecake is best made a day in advance to enhance its flavors.
Healthier Alternatives
Lightened-Up Cheesecake
- Use low-fat cream cheese and Greek yogurt in place of traditional ingredients.
- Opt for a granola crust for added nutrients.
Dairy-Free Version
- Replace cream cheese with cashew cream or coconut cream.
- Use agar-agar instead of gelatin for the filling.
These healthier alternatives can also pair beautifully with the vegan fall recipes on Taste and Recipes.
Conclusion: A Dessert Worth Celebrating
This ultimate cherry cheesecake recipe proves that simple, high-quality ingredients can come together to create a truly show-stopping dessert. Whether you choose the classic baked version or opt for the quick and easy no-bake method, the creamy filling and tangy-sweet cherry topping promise to delight every palate. It’s a dessert that combines elegance, flavor, and versatility, making it a go-to for birthdays, holidays, or casual get-togethers.
With endless customization options, from gluten-free crusts to fresh, homemade cherry toppings, this cheesecake can be adapted to suit any occasion or preference. And if you’re planning a full dessert spread, consider pairing it with complementary treats like brookies or holiday trifles to impress your guests further.
So, roll up your sleeves, gather your ingredients, and let the cherry cheesecake magic begin! There’s no better way to indulge in a dessert that’s as beautiful as it is delicious. Happy baking!

